Well, then let’s give them the appetizers…by using 15 second videos on your Instagram Stories feed.
(ok, ok…yes, my new year’s resolution is diet-related, how can you tell?)
If you haven’t spent much time with the Instagram Stories functionality, or it’s range of cool and sometimes hidden features, then you should definitely read through this post and update your knowledge.
The Stats
Instagram Stories can be anywhere from 1 to 15 seconds in length and show up on your profile and the Stories feed for 24 hours until they disappear. Posted mostly as snippets that are “in the moment” and unproduced, Stories are an amazing way to share unique and engaging content — to a massive audience. As of November 2017, Stories has over 300 million daily active users adding or watching content, which is about 60% of Instagram’s overall 500 million daily active users. That number is staggering! Since it’s roll-out in the summer of 2016, Instagram Stories have also contributed to a 7-10 minute increase in the amount of time that an average user spends in the app on a daily basis.
These stats make it clear to see that publishing Stories have the potential to broadcast your content to a very large and very active, engaged audience.
The Basics of Making Instagram Stories
Step 1 : Click on the Camera icon on the top left hand corner of the app

2. If you want to share a photo or video you’ve already captured and saved on your phone, swipe down to open that gallery
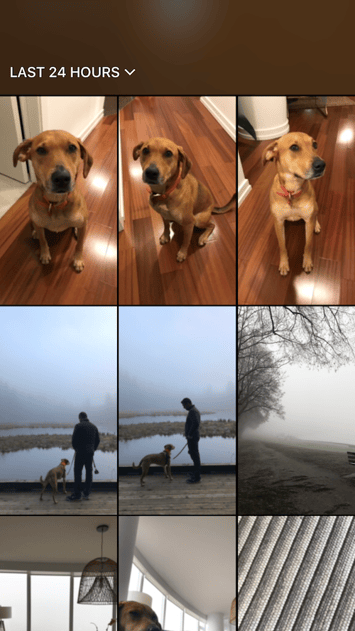
3. Alternatively, you could also take a live photo or video from the camera within the app, using the following options:
Live: Selecting the “Live” option will broadcast your filming live to your followers. Just like Facebook Live, your friends can comment and like your broadcast as long as it’s going, and once it’s finished you have the option to leave it posted on your Stories feed for 24 hours, save it, or to delete it right away.
Normal: This option is pretty self-explanatory. Clicking the button once will snap a photo, and holding it down will record a video, up to 15 seconds in length.
Boomerang: If you’ve never used the Boomerang app or its feature within Stories, you’ve been missing out. Boomerangs loop 3-second video clips, just like the GIF memes we’ve all come to love.
Superzoom: Hold down the buttom to literally super zoom-in on the subject you’re recording. If you turn up the volume while recording, you’ll also be gifted with a dramatic sound effect to accompany the zoom.
Rewind: Just as it sounds, you can use this lens to film a video in reverse (which usually produces very entertaining results).
Hands-Free: Many influencers take advantage of this, using the lens to set up their camera to record videos “hands free” like make-up or cooking tutorials.
Stop Motion: This lens takes a series of still shots and weaves them together into one seamless video (like my all-time favorite childhood show, Pingu).
4. Once you’ve selected or taken the photo or video you want to share, it’s time to have some fun with it using filters, stickers or special effects. I’ll use a photo of my skeptical-looking dog, Lucie, as a model.
Stickers: There are a number of stickers available to overlay onto your photo or video, and these are always up to date with current events or holidays. Swipe up to bring up the list of Stickers, or click on the happy face icon along the top of the screen. You can scroll between pages of Stickers to find the main ones (listed below), recently used (to the left) and hats and glasses (to the right).
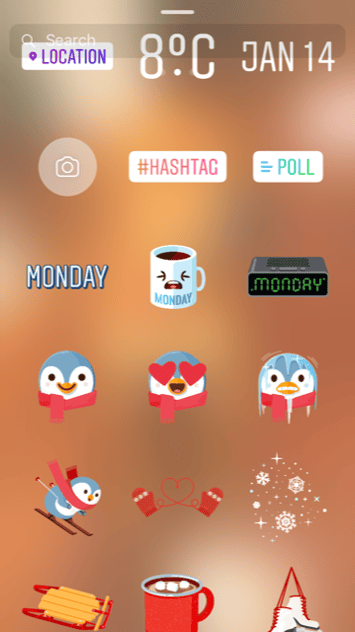
You can add location, timestamp, hashtag or even poll Stickers, and every Sticker can be enlarged, shrunk, tilted or spun around by pinching your fingers on the screen in the direction you want it to go. Hashtag and location Stickers work the same way as they do for regular posts within the app — tap on a location, for example, and you’ll be able to see other photos and Stories happening in the same place around the world. Likewise for hashtags.
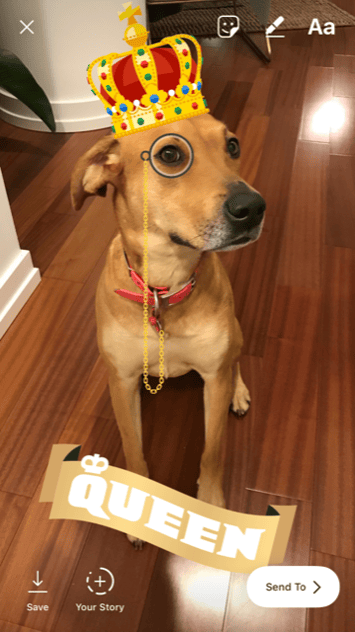
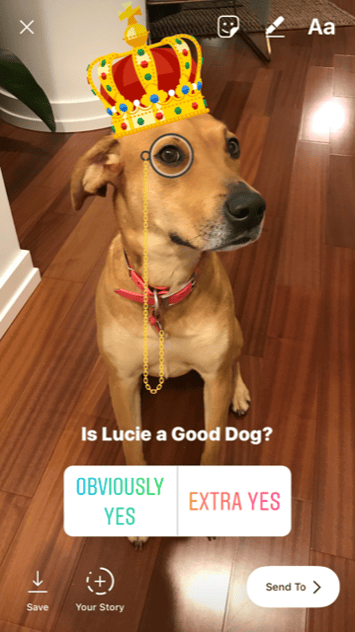
When you place some of the Stickers, like the timestamp or location ones, you can tap on them once to change the color from a darker background to a lighter version. If you’re unhappy with the placement of your Sticker, you can drag it to the bottom of the screen into a trash can icon that will appear, and start fresh.
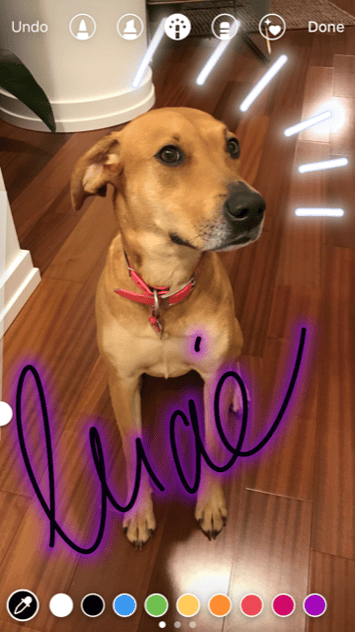
Pen: There is also a Pen feature that will allow you to add custom artwork, words, or any other embellishment you can create with your fingertip. Simply tap the Pen icon along the top of the screen and another option menu will appear.
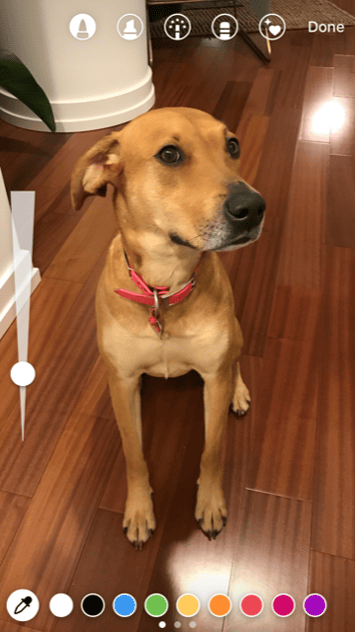
The funnel along the left-hand size of the screen allows you to increase or decrease the width of your Pen tip. So if you wanted to handwrite some text, I’d recommend you go with the thinnest Pen tip.
The colors along the bottom allow you to change the color of your Pen “ink”, and the options along the top of the screen detail the type of Pen. For example, the first option is a regular point-tip Pen, while the second one offers a slanted tip. The third option is like a highlighter, and gives a fun, “glowy” effect. The fourth option is the eraser, in case you want to do a bit of clean-up, and the fifth option gives a chalk effect. Changing the color changes the effect that each of these options have. See how fun it can be?
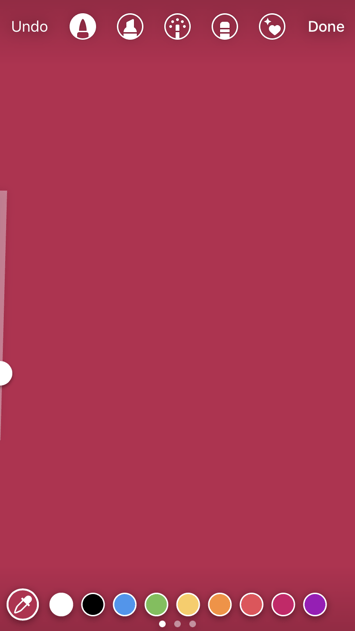
You can also add a post with a blank background color, which is helpful for text posts, like if you want to advertise a change in store hours or an upcoming sale. Simply bring up any photo, go to the Pen feature and along the color chart at the bottom, press and hold. The full color spectrum will come up, select a color, and scribble it across the screen. Once you have a few scribbles, hold your finger down until the entire screen fills with the color you’ve selected.
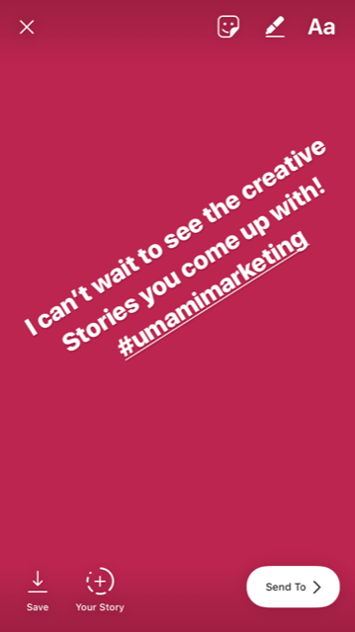
Text: If coloring and drawing aren’t for you or your brand, or you have a larger volume of text you want to display, then you can still rely on the good ol’ Text tool.
Back on the main screen with the photo or video you’ve selected, click on the “Aa” icon in the top right corner. Similar to the Pen, you can type your words in any color, make them bigger or smaller with the funnel on the left hand side of the app. You can also increase or decrease the size or angle of your text by pinching your fingers in and out across the screen. There is an “A” in a square box at the top of the screen — you can click this to add a background color to your text. The default is white, but you can use the color chart at the bottom of the screen to change this however you’d like.
Any Text typed will default to a centred alignment, but if you select all the text you’ve typed and slide your finger to the left on the screen, it will align your text to the left. Swipe your finger to the right and it will move your text back to centre, or aligned to the right.
Music: If you don’t like the background noise in a video you’re taking, or want to jazz it up a bit, you can overwrite it all with a custom music selection. Simply play a song from your music library while you’re taking a video at the same time, and make sure the sound icon below is on and not muted.
On the other hand if you’ve taken video footage and don’t want any background noise or music to be heard, simply press the sound icon to ensure it’s muted before you publish.
![]()
5. Check your Stories Settings
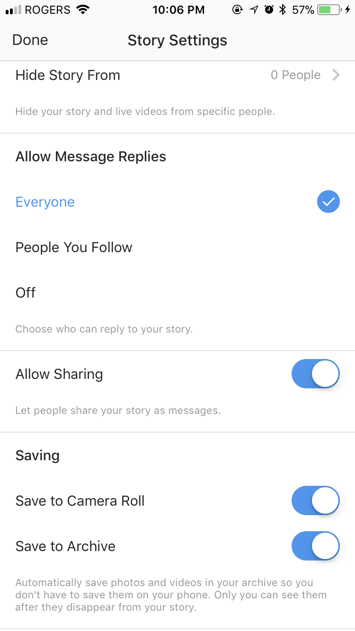
At any given point while creating your post, you’ll see a Setting wheel in the top left hand corner of the screen. Click on this to review your Stories settings before you publish your first post. As a brand, it’s important to make sure the “Allow Message Replies” option is selected, so that your audience can respond to each of your Stories posts, which will be directly delivered as messages to your Direct Message inbox.
6. After you’ve added all of your Sticker, Pen and Text embellishments, it’s time to PUBLISH! Click on the giant Send to > button on the bottom right corner of the screen, and beside “Your Story” click Share.
You can access and re-watch your Stories at any point from the homepage (just click on your image). Here you can see results as to how many people have viewed your Story, and you can choose to save or delete any of the individual posts as well.
That’s it!
We hope this post has helped you become aware of some of the tips and features Instagram Stories has to offer, and you can use this as a reference point in your future creative endeavors. We hope you have fun venturing into the world of a real-life Social Media Influencer!


![3 Tips For Creating A Community On Clubhouse [Video]](https://umamimarketing.com/wp-content/uploads/2021/03/dmitry-mashkin-EHvk2d2vAuQ-unsplash-720x341.jpg)